A Simple Driver
This tutorial assumes you have setup your project structure to match project-setup.
Here is an example of a very simple driver. It doesn't do anything at all, but shows the bare minimum that must be written to get a driver to run.
indi_mycustomdriver.h
#pragma once

#include "libindi/defaultdevice.h"

class MyCustomDriver : public INDI::DefaultDevice
{
public:
    MyCustomDriver();
    virtual ~MyCustomDriver() = default;

    // You must override this method in your class.
    virtual const char *getDefaultName() override;
};
indi_mycustomdriver.cpp
#include "config.h"
#include "indi_mycustomdriver.h"

// We declare an auto pointer to MyCustomDriver.
static std::unique_ptr<MyCustomDriver> mydriver(new MyCustomDriver());

MyCustomDriver::MyCustomDriver()
{
    setVersion(CDRIVER_VERSION_MAJOR, CDRIVER_VERSION_MINOR);
}

const char *MyCustomDriver::getDefaultName()
{
    return "My Custom Driver";
}
Compiling
First create a build folder in your project's folder, move into it and configure the project with cmake.
mkdir build
cd build
cmake -DCMAKE_INSTALL_PREFIX=/usr -DCMAKE_BUILD_TYPE=Debug ../
If you look in the build folder, you should now see the config.h and indi_mycustomdriver.xml files with the version info set properly.
Now we can build our executable.
make
And install it.
sudo make install
If you want to see your driver in KStars, be sure to restart it after installing your driver (only needed once).
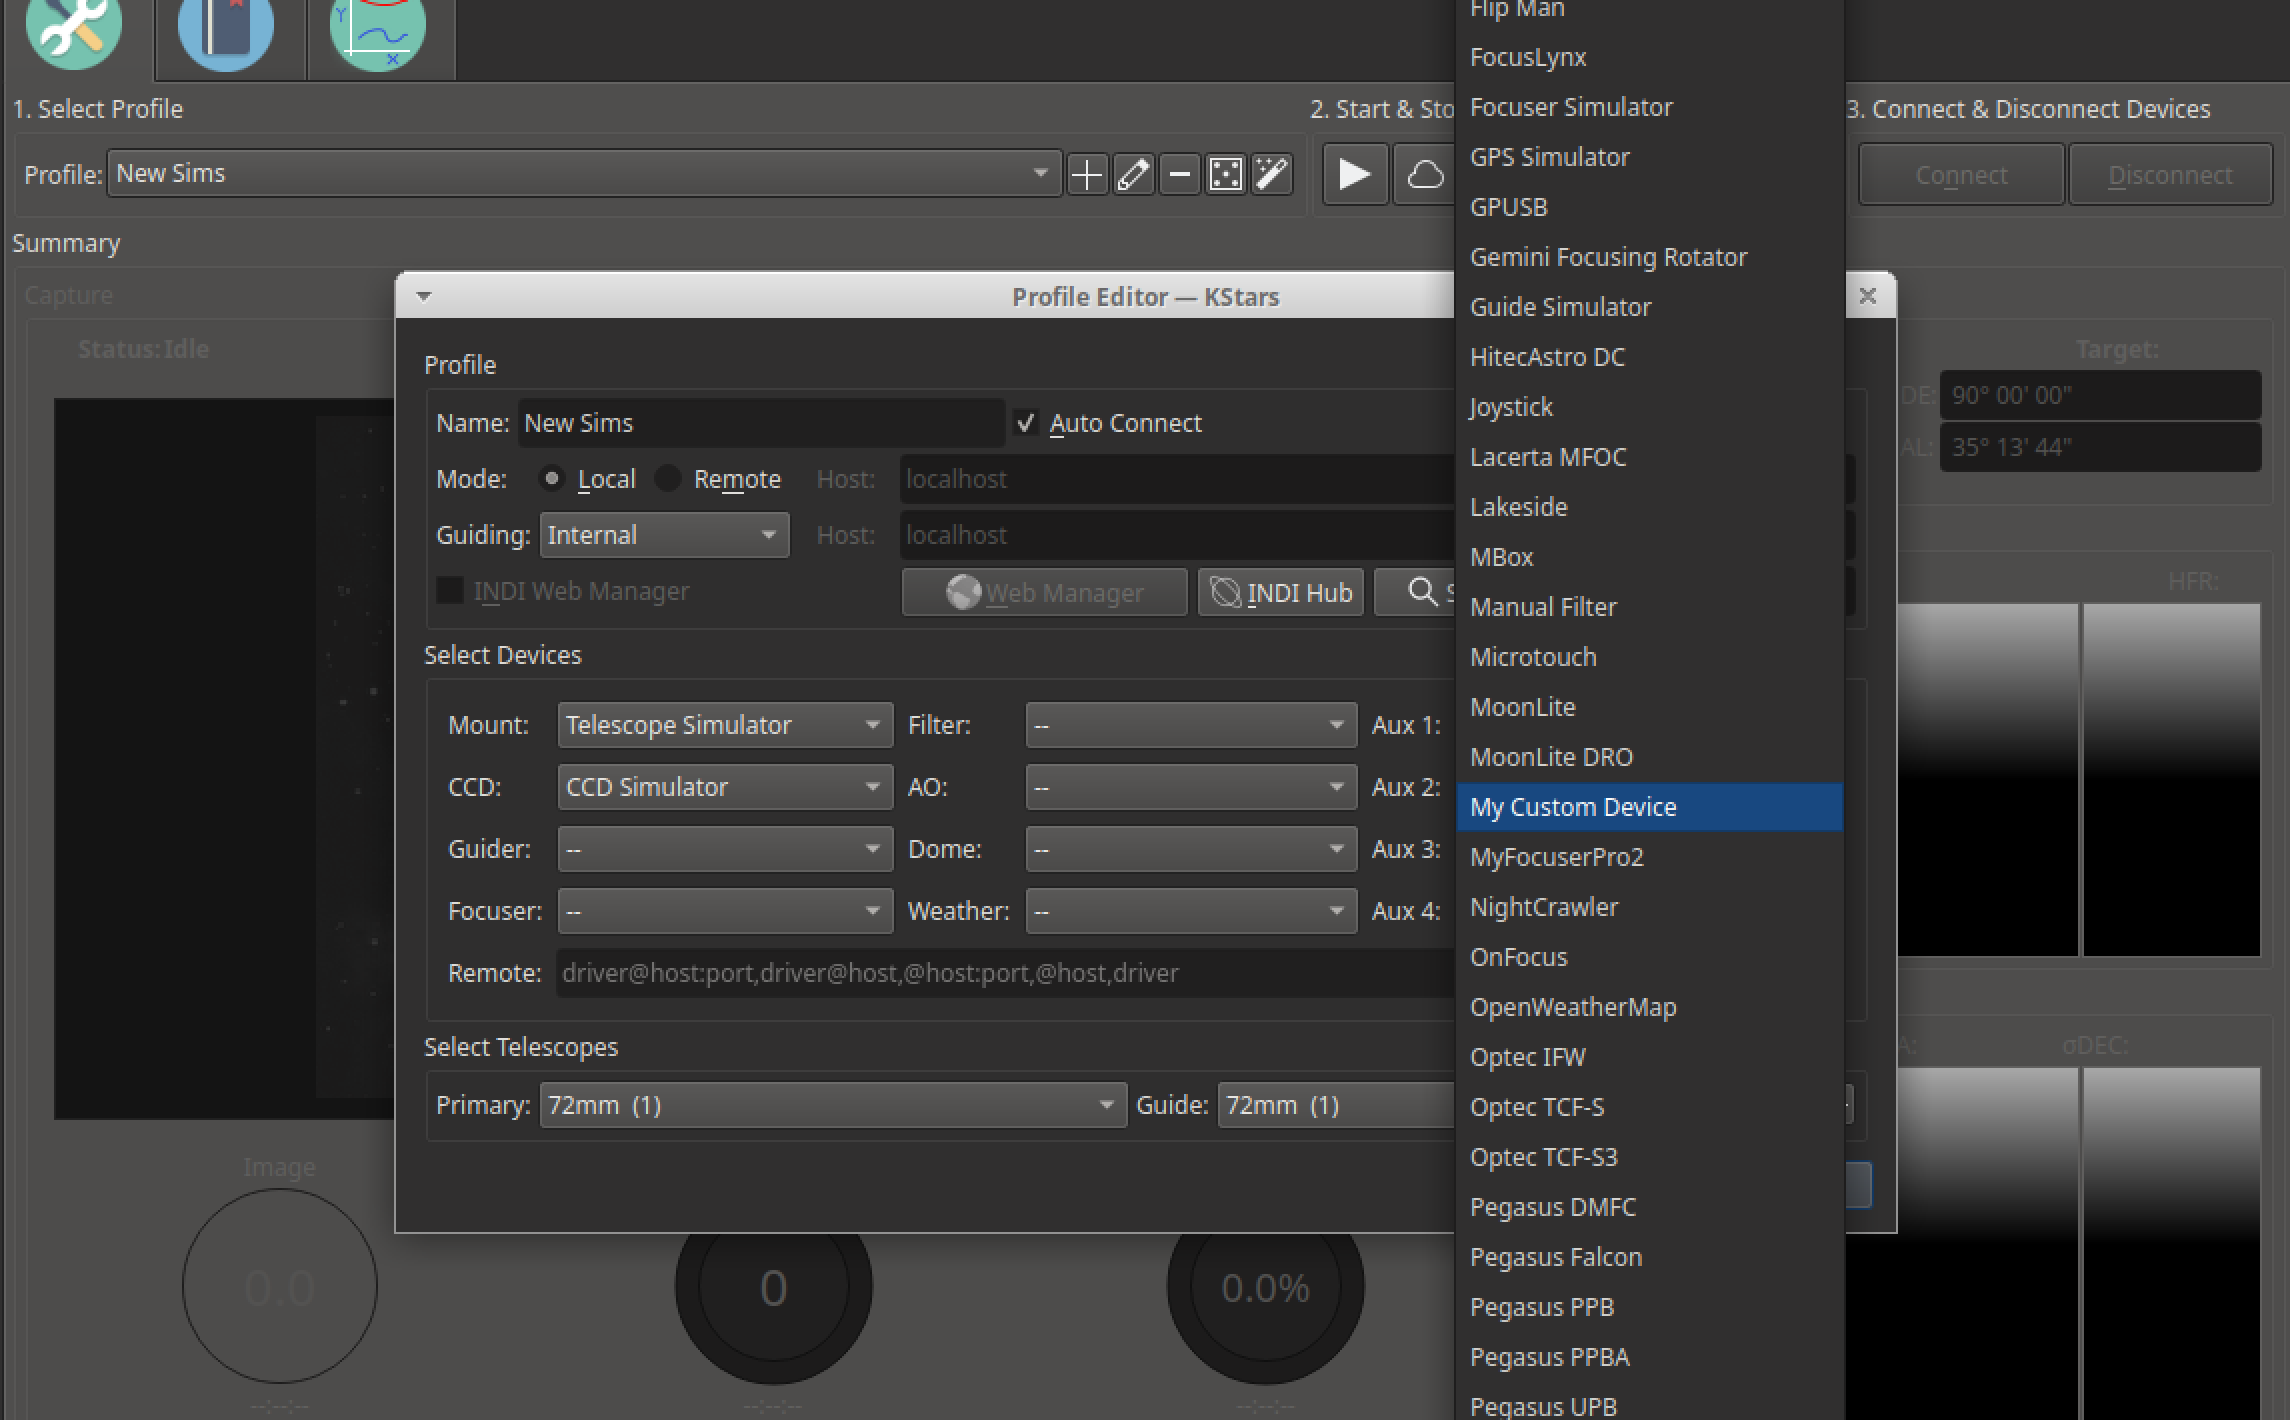
So let's add it to a profile and start our driver.
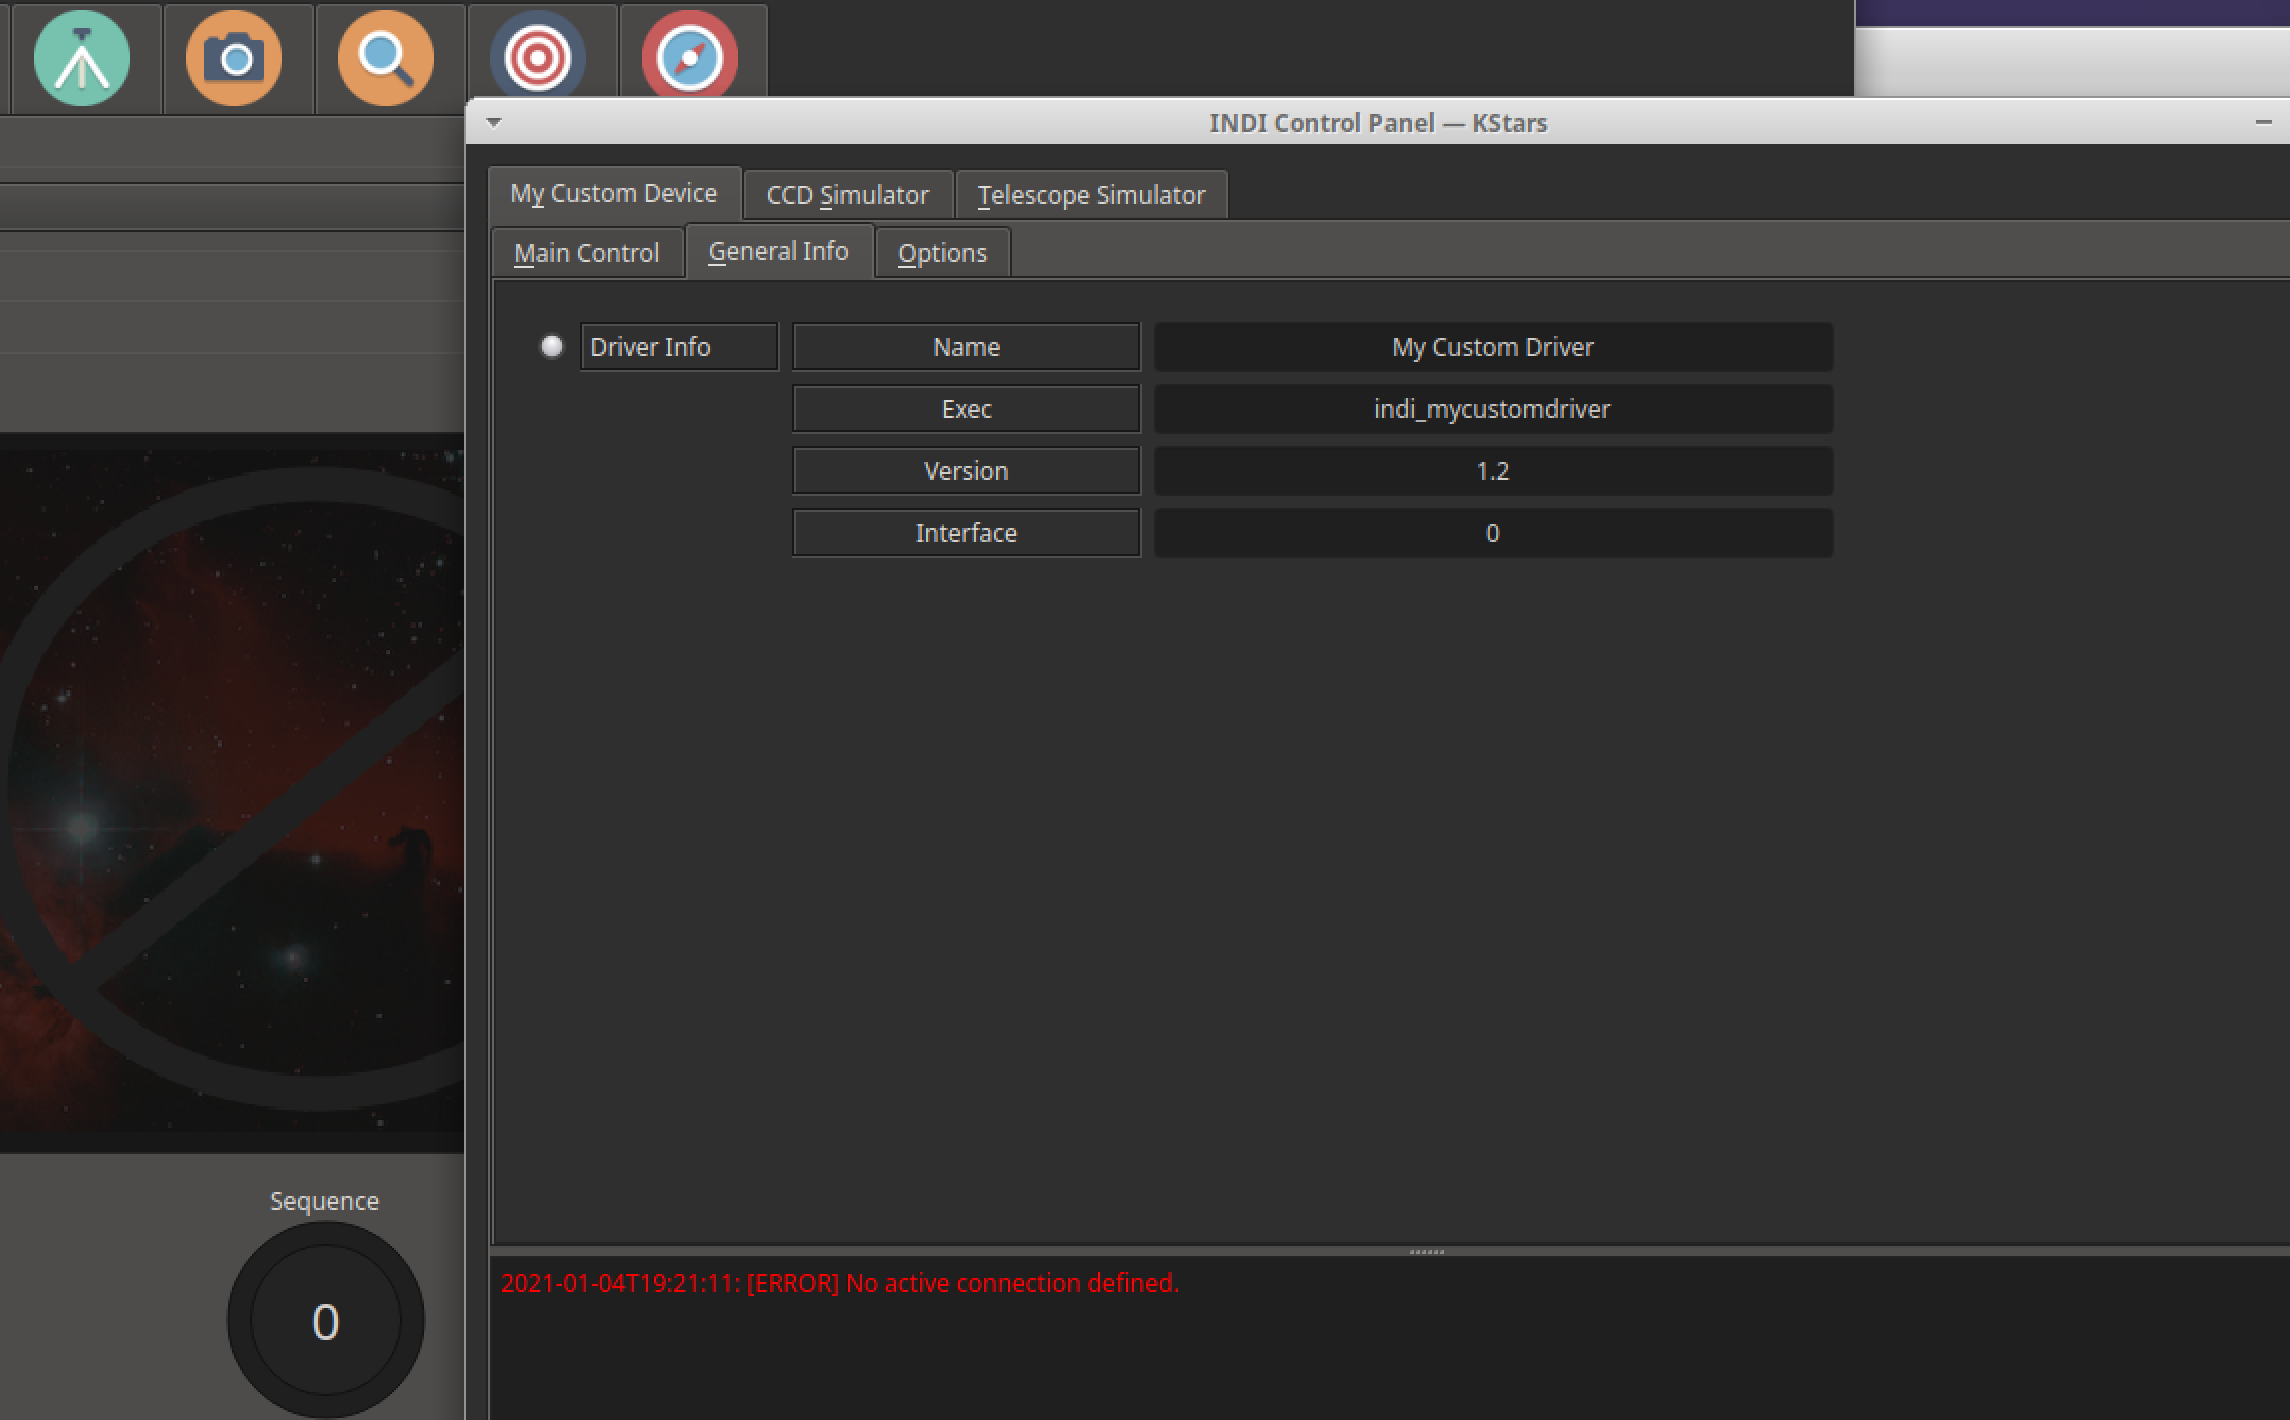
When we do, we can see it in the INDI Control Panel, with the Main Control, General Info, and Options tabs available.
Moving On
Now we have a driver running, but it doesn't do anything. So let's move on to properties.